My keyboard
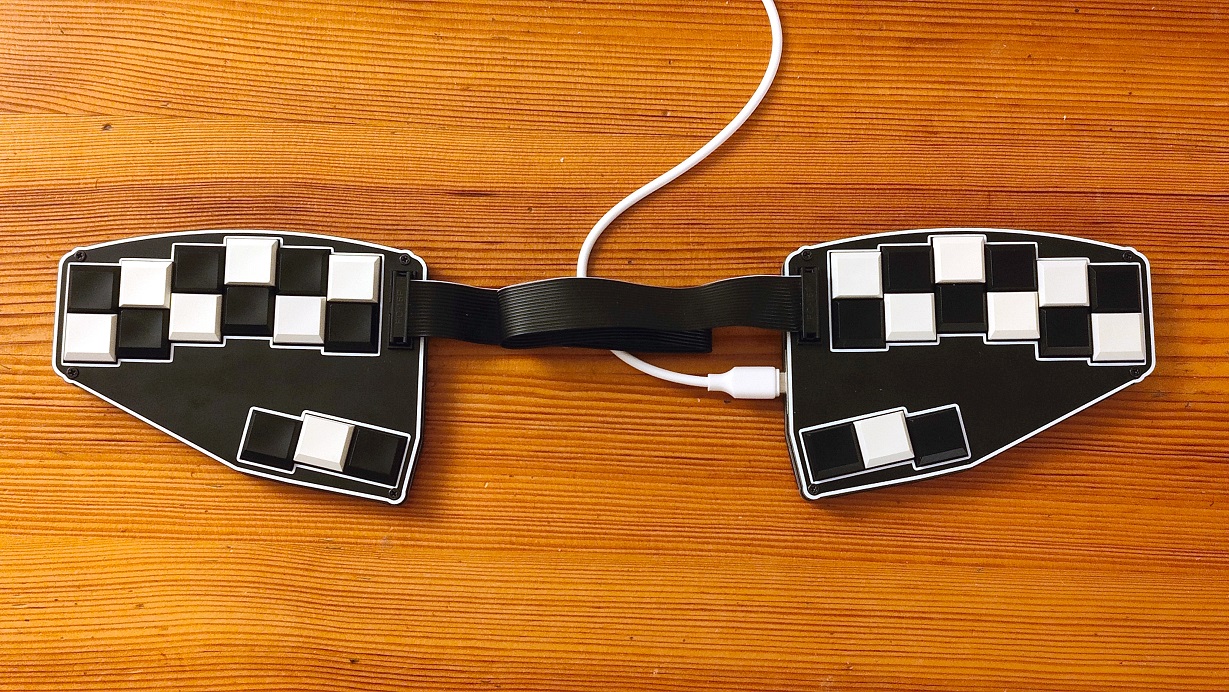
The Skaboard, a split keyboard with checkerboard-coloured keys.
This is the Skaboard. It is a split stenography keyboard I designed as a best-of-both-worlds between two steno keyboards I use regularly: the Georgi and the Polyglot.
WHY MAKE A NEW KEYBOARD
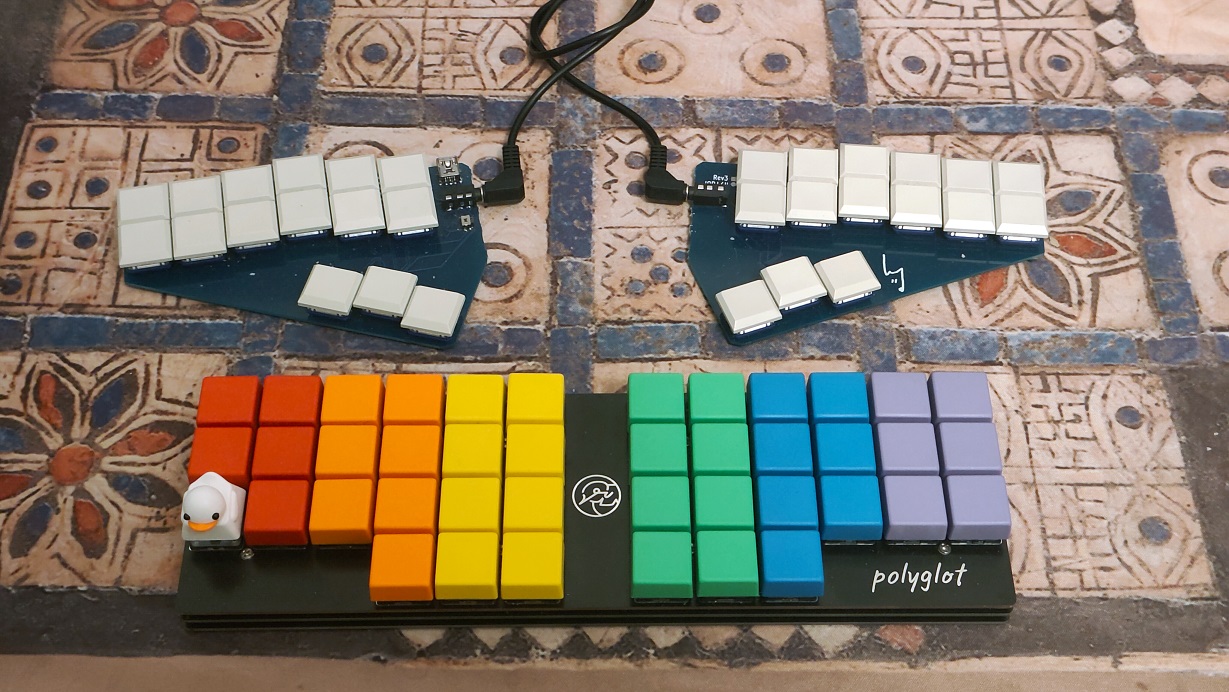
The Georgi and the Polyglot.
The Georgi and the Polyglot are both great keyboards, but they are both lacking in ways I find frustrating for my own usage.
The Georgi
Here's what the Georgi has that the Polyglot doesn't:
- Split. The Georgi is a split keyboard using a TRRS cable.
- Staggered columns. The index finger column is the highest, and the other columns slope downwards from it.
- Low profile. The Georgi sits very low to the desktop. It uses Kailh Choc low profile switches, which sit much closer to the board than typical Cherry MX style switches.
These three factors make the Georgi a very ergonomic keyboard to use. It's also extremely portable, and can lay flush against a laptop in a laptop bag.
The Polyglot
Here's what the Polyglot has that the Georgi doesn't:
- Modifier keys. The Polyglot is a chunky keyboard, and it has a lot of keys to spare. The keys in the third row act as modifiers (ctrl, shift, alt, meta) along with some other miscellaneous uses (arrow keys, volume up/down). I find the ctrl and shift keys important for mouse navigation.
- Embedded steno. The Polyglot has 16MB of onboard memory. This is enough onboard memory to run Javelin, a custom firmware which lets you use the keyboard without using Plover (the software typically used for hobbyist stenography). It makes using the keyboard easier, and means I can use it on my phone/tablet as well as my laptop.
These factors make the Polyglot a powerhouse that's usable in any use-case.
The Skaboard
My goal was to make a keyboard that did all of these things at once. I also wanted it to be easy to solder, easy to build firmware for, and as cheap as reasonably possible. The end result is the Skaboard.
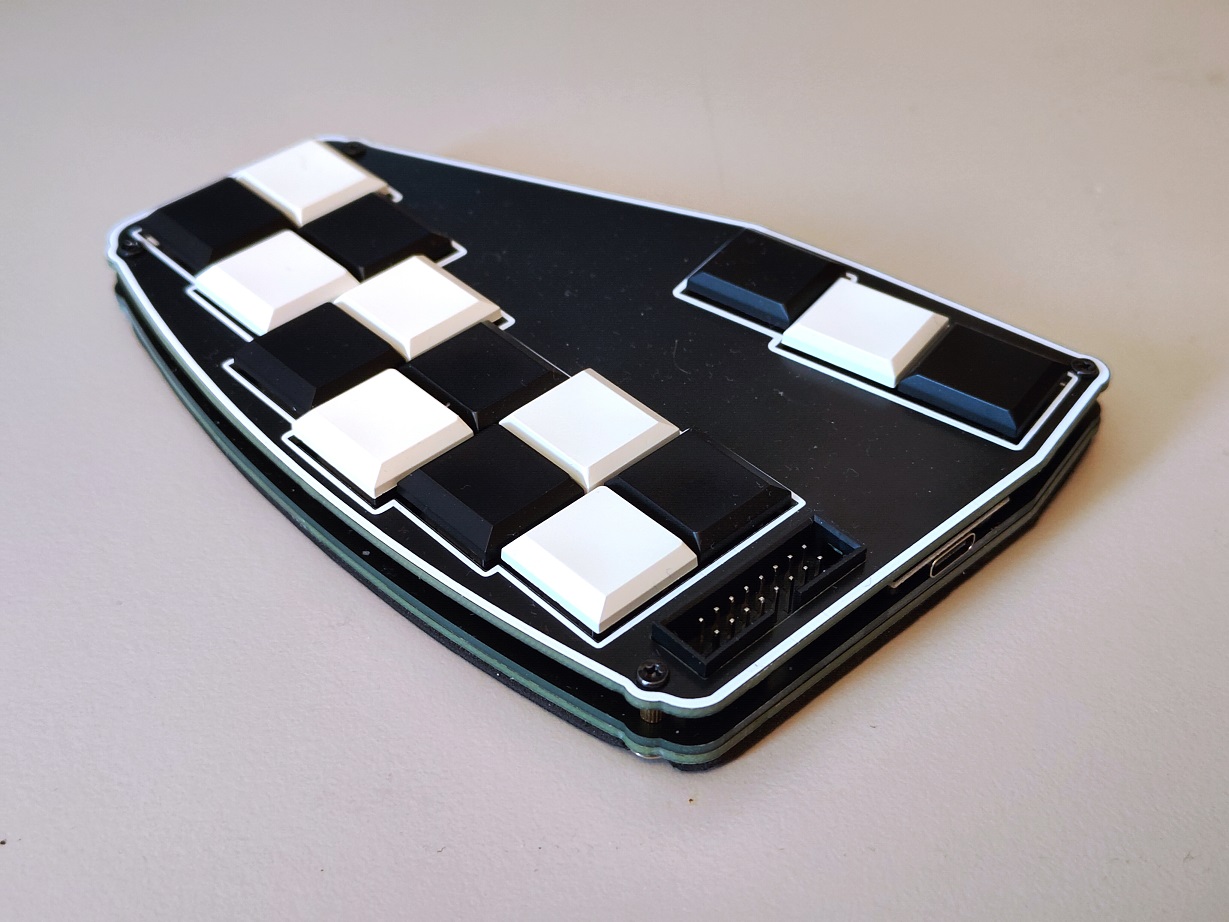
The right-hand side of the Skaboard. The Raspberry Pi Pico is visible peeking out on the bottom right.
Q&A
Q. How do you make a keyboard split AND easy to make? Doesn't a split keyboard need something weird like an I2C connection via a TRRS cable?
A. If you use a TRRS cable, it gets harder to make a split keyboard. But if you just connect the two sides direct, wire for wire, it's trivial.
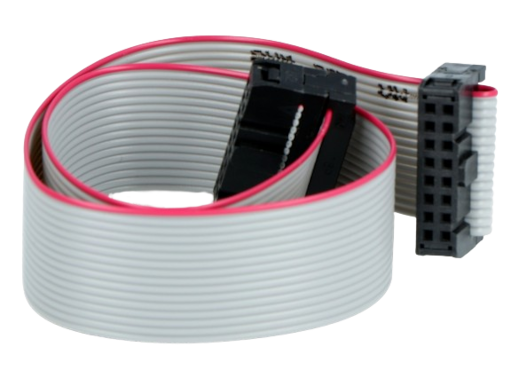
A 16-pin IDC cable.
This is an IDC connector, which does exactly that. It's pretty common, cheap to buy, and its sockets are easy to solder.
Q. You say "easy to solder", but I've seen DIY keyboard kits before. They involve soldering a tonne of diodes.
A. You only need diodes if your keyboard uses a matrix circuit. If you're just directly connecting each key to a separate pin, you don't need any diodes. As it happens, the Raspberry Pi Pico has 26 input pins, exactly the right amount to connect all the keys I want. (all 23 typical stenotype inputs, plus ctrl, shift and alt)
Q. Why ska?
A. Why not, man?
Q. How do I make my own?
A. Great question.